click to return to home page
 

email: astronomiser001@gmail.com
We accept:

click to book a mod
>Home<   >New and Used Canon dSLRs<   [ Modifications: >Introduction<   >Filters<   >Getting Your Camera Modded<   >Booking< ]   >Contact Us<

Restoring Your Camera's Original White Balance for Daytime Photography.


Introduction.

In my opinion, it's better to keep an astronomy modified camera solely for astrophotography - dust and dirt that collects on the front filter isn't noticeable in normal daylight photography, but even one or two dots can cause big blobs or doughnuts which stand out when the background is predominantly black and the resultant images are stretched to cover the whole histogram to pick out fine detail. I recommend that you store your astronomy modified camera carefully and use it solely for astrophotography.

Having said that, a camera is an expensive piece of equipment, and I appreciate that a lot of people will want to get the most out of their investment, so to start with, a few things you can do to reduce the chances of dirt getting into the mirror box.

  • Always ensure the body is capped.
  • Avoid changing lenses as much as possible and...
  • If you do change lenses, do it in a dust free enclosed environment.
  • Ensure that lenses are dust free when you attach them to your camera.
  • When you have finished using your camera, use 'manual cleaning' and a bulb blower to clear dust from the front filter.

So What's the problem?

Post-mod, the camera is far more sensitive in the red. In this image below, the left side of the image shows the door pre-mod and the right side is post-mod.

There are essentially three different approaches to obtaining colour corrected images post-modification. You can use software to adjust response levels, use a filter to restore white balance or shoot in one of your camera's manual modes and use a 'Custom White Balance'. I'll look at the basics of each of those options below.

Software
Filters
Custom White Balance


A case of the 'dust bunnies'.

Top

Software.

Perhaps the easiest method of using your camera for normal photography is simply just to edit the images in software after the fact. In around 90% of cases, a simple 'auto-levels' adjustment in software such as Photoshop will restore a reasonable white balance. A manual levels adjustment can be used to tweak the end image.

Advantages

Most cameras are supplied with software such as Photoshop Elements so there is no cost involved. Also, you can download software sure as GNU Image Manipulation Program (GIMP) which will also be able to do this for you.

It's very simple to do and works with around 90% of most normal photos.

Disdvantages

In the 10% of cases where it doesn't work, it's often not possible to save the image and it tends to be images of similar types where it doesn't work so often you can lose a whole session. For example, I took a series of shots from Kielder Observatory looking down over the reservoir and it was impossible to stop the general overall green of the images from looking a bit 'acidic' and bright. None of the pictures I took in that session were salvageable.

There's no way to tell if the pictures are going to be any good until you actually transfer them to a computer and run the software.


Levels adjustment in Photoshop.

Top

Filters.

The are several different filters which are capable of restoring the original white balance, perhaps the most well known of which is the Astronomik OWB (Original White Balance) EOS Clip Filter

Some of you may have noticed that if you leave a CLS filter in your camera, it often does a surprisingly good job of restoring original levels of red (as it cuts the Low Pressure Sodium and High Pressure Sodium lines both of which are in the red end of the spectrum), the draw back being that although it's OK under general white lighting, it works less well under coloured lighting or outside at night under street lighting.

The below section looks at two different types - the Astronomik OWB and LDP LLC (maxmax.com) CC1 filter.

Astronomik OWB (Original White Balance) EOS Clip Filter

This filter clips inside the camera body when the lens is detached. It accurately corrects the camera's white balance to it's original settings.

More information on this filter can be seen on the Astronomik website.

Advantages

The filter is a simple fit-and-forget design - once inserted into the camera body, you can just take photos as normal and they will come out looking as they would have done before the camera was modified.

The filter provides some protection against dust entry into the mirror box.

Disdvantages

The filter will not fit behind 'short' lenses of the EF-S type which project back into the camera body - you can only use EF lenses.

When looking through the viewfinder, the whole scene will look blue.

At £104 at the time of writing, it is relatively expensive.


Astronomik OWB filter, fitted.


LDP LLC (maxmax.com) CC1 Filter

The CC1 filter fits to the end of a lens and is manufactured in a broad range of sizes and at $76 for the 58mm filter, at the time of writing, it is relatively inexpensive .

These filters are available from LDP LLC MaxMax.com

Advantages

It can be bought in a variety of sizes and will attach to any lens.

It's easy to fit and can be left attached to your lens so all you need to do is fit the lens and you are ready to go

Disdvantages

If you have several different sized lenses you will need several of these, though adapters are available from most good photographic retailers.

When looking through the viewfinder, the whole scene will look blue.


72mm X-Nite CC1 Filter.

Top

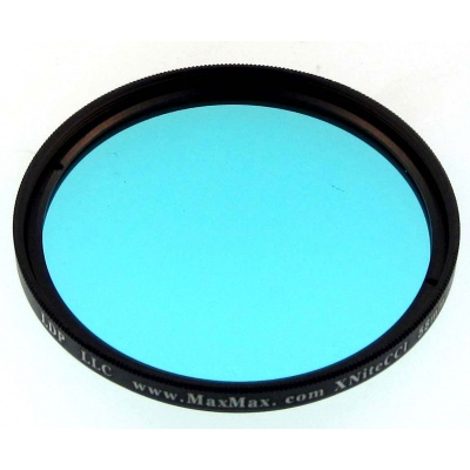
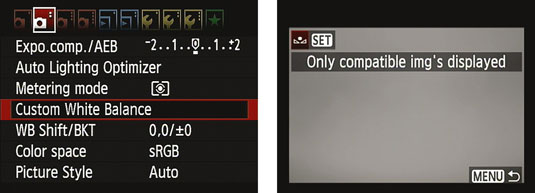
Setting a Custom White Balance (CWB)

To set a Custom White Balance, you will need to take a shot of a white piece of paper using the same lighting conditions as you intend to use the camera. Normally, it's enough to do an indoor shot and an outdoor (daylight) shot and keep these on your SD card and switch between the two. Photographic shops stock reference cards for doing this, though personally, I've found good quality printer paper to be sufficient.

To take the shot, place the piece of paper on the floor in a well lit area, set the camera to auto, set the focus to manual and infinity, then fill the viewfinder with the (out of focus) sheet of paper and take the shot.

To set the CWB, switch the camera to any of the manual modes and navigate through the shooting menus (often it's in the second shooting menu) and find Custom White balance.

Select Custom White Balance - the camera will offer you all compatible images on the card, scroll through and find the right shot and press the 'set' button.

The Custom White Balance will be applied in all manual shooting modes. If you wish to basically use auto, then point the camera and half depress the shutter button in full auto mode, then click the wheel round to the 'P' position, but don't change anything and take the shot.

Advantages

It's free and pretty accurate.

Disdvantages

If you want to shoot in full auto mode, the CWB will not be applied.

It takes longer to set up a shot.


Top

The River Derwent, County Durham.

>Contacting astronomiser<     >Payments, Postage and Worldwide Deliveries<     >Privacy Policy<     >The sci-fi novels of Andy Ellis<

>web design by Andy Ellis<